In our video we used fades and dissolves to create the effect of manipulating diegetic time and space. The use of the dissolve creates the idea that the main character is having a flashback, remembering where she had put her phone. This is made clear to the audience through this use of the dissolve. After this dissolve the colour of the short sequence has been changed to black and white to further emphasise this change in time and space.
Wednesday, 10 December 2014
Task Twelve - Transitions and Effects
There are many different transitions and effects that can be used to manipulate the diegetic time and space. This can be done through the use of transitions, graphic match, following the action, multiple points of view, shot variation and manipulation of time and space.
Transitions include things such as cut, dissolve, fade and wipe. Transitions are used carefully as different transitions can mean different things to the audience and it is therefore important to use the right one. A Straight Cut is the most common form of transition and it is virtually 'invisible'. One shot moves instantaneously to the next without attracting the attention of the audience. Using straight cuts are helpful as they help to retain reality. They are mostly used in continuity editing as they don't break the viewers suspensions of disbelief, in other words their willingness to accept what's happening.
The next type of transition is a Dissolve, this is when one shot is faded off the screen whilst another shot is fading in. When using this, the audience will be able to see both shots at the same time, at the mid-point of the dissolve. This is an effective transition as it suggests that the two shots are connected in some way, it could be anything from two characters to two places or objects. It can also be used to suggest that some time has passed between shots.

Fade is also an example of a transition, this is similar to a dissolve but instead of dissolving one shot into another a fade is a gradual darkening or lightening of an image until the screen becomes black or white. Normally a white fade is used to symbolise the end of something and a black fade is usually used to symbolise the beginning of something, however this is not always the case. A fade indicates the start or an end to a particular section of time within the narrative.
Finally there is a Wipe. This is the more unusual out of the different transitions and it is when one image is pushed off the screen by another. These images can be pushed in any direction but it is more common for the image to be pushed off the left-hand side, this movement is more consistent with the sense of time moving forward. Using a wipe can be effective as it signals to the audience that they are being shown different locations that are experiencing the same time. It is the visual equivalent of saying 'meanwhile...'. These types of transitions are used a lot in the Star Wars films.
A Graphic Match can also be another way of manipulating diegetic time and space. This is a very special type of transition and it is something an editor adds between two shots but more a decision about which two shots to put next to each other. This graphic match is created when two images that are similar in shape and size are placed next to each other to look like almost the same thing. Using a graphic match tells the audience that there is a very important link between whatever it is they are seeing in the two shots. An example of when this is used is in the film Psycho.

Effects can be used to manipulate diegetic time and space very effectively, they are a very important part of the film industry. They can be used to show that a time period has changed in a flashback/forward, to show a location has changed, and to show that time is moving quicker or slower than normal. However an effect doesn't have to be complicated as it can simply be the use of a colour filter or altering the saturation of an image to either enhance the colour or remove it. When a flashback effect is needed the editor tends to make the image black or white. One common technique is altering the speed of the footage. A good example of this is in the film The Time Machine in which the main character enters the time machine and the environment changes as he travels through time, a similar example is the Time Turner in Harry Potter. There are many different types of effects that can be added in the post production stage of editing to achieve the desired effect.
Wednesday, 26 November 2014
Task Eleven - Creating Pace with Cross Cutting
In our video we were able to create pace with cross cutting and by the use of music. The video starts of at a normal speed and we don't expect anything to happen. However as the sequence goes on the editing gets faster and we cross cut between the main characters. We emphasised this effect by adding music with different paces, we used a fairly slow song when the 'villain' was getting ready but we used a faster paced song when the other character overheard the conversation and start to get ready to. By putting these elements together we were able to create pace and tension.
Saturday, 8 November 2014
Task Ten - Understanding Pace
Throughout the making of a film the pace of editing can be used to create a range of effects and to engage the audience.
The pace of editing is helpful when trying to engage the viewer. If the audience is not engaged with what is going on then they are unlikely to sit and watch it, and will go on to tell others of their experience. A way to make sure that they are engaged throughout can be done through a number of techniques, for example Speed of Editing. In a film each scene may last a matter of seconds or could continue for minutes but the length of each sequence establishes the pace of the film moving the action along. By using Speed of Editing the audience can determine the mood of what is taking place on screen. If you want the audience to feel anxiety and suspense then the editing is likely to be quick, with each scene lasting a number of seconds for example in an Action movie. However if you want the audience to feel more relaxed then the scenes are likely to be longer, lasting minutes instead of seconds and change less frequently, for example a Romantic comedy. An example where this is used is The Notebook.
Cross Cutting can also be used to create a range of effects. This is when you deliberately cut from one scene to another to create tension or similar effects. This is mostly used when the filmmaker wants to create a sense of drama, this is most commonly used in horror movies, an example is the opening sequence to Scream. Cross Cutting allows the filmmaker to cut from one shot to another, normally to show different things happening simultaneously. This is generally used to build up tension and lead to the climax of the film. An example of this is the opening scene of Scream.
A cutaway shot is an interruption of a continuously filmed action by inserting a view of something else. By itself the cutaway doesn't create a lot of tension, but the editor uses it to make a longer sequence. Switching to another shot that is related to the main storyline helps to make the sequence longer, helping with the Speed of Editing. This relates to the Creating of Pace, making the shots longer helps to make the scene more relaxed and the audience don't expect anything. At this point the pace will be slower. However, if you start cutting from shot to shot the pace will be faster and suspension will start to build.
Finally, the pace of editing is extremely effective with the Development of Drama. Normally when a film has little drama going on then the shots tend to be longer and last a number of minutes. This doesn't create much of an effect within the audience as they don't expect anything bad to happen. This makes it easier for the Development of Drama to begin as the audience will be completely unaware. As the drama builds up, the pace of editing will be a lot faster, with scenes lasting seconds, this helps to create the drama which the director intentionally wanted to happen. Therefore the pace and speed of editing is extremely important when making a good movie.
Friday, 7 November 2014
Task Nine - Non-Continuity
Non-Continuity editing is a style of filmmaking that was made poplar throughout the 1950's and 1960's. Filmmakers such as Jean Luc Goddard and Français Truffaut pushed the limits of editing techniques and created a new style called 'The French New Wave'. This style used a carefree editing style and did not conform to the traditional editing etiquette of Hollywood Films. 'The French New Wave' editing often drew attention to itself by it's lack of continuity. It's self-reflexive nature reminded the audience that they were watching a film rather than a portrayal of real life. They often used material that wasn't related to any narrative which kept the audience surprised and intrigued.
A Bout de Soufflé
In this scene from A Bout de Soufflé we see an example of a jump cut when Seberg picks up the mirror and then suddenly it's gone again. Jump Cut's are usually used to startle the viewer and draw attention to something, in this case the mirror in her hand.
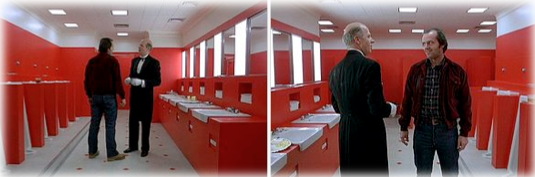
Another example of when the filmmaker uses non-continuity editing is in the film The Shining by Stanley Kubrick where the 180 degree rule is purposely broken to create surprise and confusion within the audience. The use of this break of the 180 degree rule is effective as we can see the characters have swapped places, emphasising the idea that there is a lot of confusion and someone is in danger. The audience becomes startled but intrigued to find out what is going to happen. The breaking of this 180 degree rule is also use in The Hunger Games, by Gary Ross, again to emphasise the idea that there is danger, as if something is inevitably going to go wrong, and that possibly something bad will happen to the main character.
Another example of when the filmmaker uses non-continuity editing is in the film The Shining by Stanley Kubrick where the 180 degree rule is purposely broken to create surprise and confusion within the audience. The use of this break of the 180 degree rule is effective as we can see the characters have swapped places, emphasising the idea that there is a lot of confusion and someone is in danger. The audience becomes startled but intrigued to find out what is going to happen. The breaking of this 180 degree rule is also use in The Hunger Games, by Gary Ross, again to emphasise the idea that there is danger, as if something is inevitably going to go wrong, and that possibly something bad will happen to the main character.


Friday, 24 October 2014
Task Eight - Using Continuity Editing Techniques
In our sequence we use a range of continuity editing techniques to create the clip. We put in Match on Action, Shot, Reverse Shot, Eye Line Match and the 180 Degree Rule.
The first use of continuity editing is the Match on Action which we used on the door shot. We see her walking down the corridor towards the door and we see the outside of the door. Then in the next shot the camera has been moved into the classroom and we see the rest of the action but from the inside. I think that we did the Match on Action well as it runs smoothly and is continuous.
We also use an Eye Line Match when the teacher is writing on the whiteboard and then looks away. We see a shot of her writing then immediately after the camera cuts to a shot of the clock. It's hear when we see the object was looking at in the previous shot. I believe that we done this shot rarely well as we do see the teacher looking away and back again, and then we see the clock. However, i think that net time it should be a lot clearer on where a bouts the teacher is looking as some people may not realise that she is looking at the clock but rather looking at something else.
The Shot, Reverse Shot was used when we filmed the conversation sequence. We start of with a shot of the student walking in, then it cuts to a shot of the teacher asking why she's late, then we see the student again. I think that we done the Shot, Reverse Shot fairly well as the camera does cut between the two characters and we can clearly see who's talking to who and when.
Finally, throughout the sequence we have kept to the 180 Degree Rule and have not broken it at any point during the clip. The teacher is always on the right and the student is always on the left and this is continuous throughout.
Friday, 17 October 2014
Task Seven - Understanding Continuity Editing
Continuity Editing is the predominant style of film and video editing. The purpose of continuity editing is to ensure temporal and spatial continuity as a way of advancing narrative, using such techniques as the 180 degree rule, Match on Action, and Shot,Reverse Shot. It was developed by early European and American directors, in particular D.W. Griffith in his films such as The Birth of a Nation. Continuity Editing is important as it helps to retain a sense of realistic chronology and generates the feeling that time is moving forward. It doesn't mean you can't use flashbacks or flash forwards, as long as the narrative will still be seen to be progressing forward in an expected or realistic way.
The first type of continuity editing is Match on Action. This is when you start an action in one shot and finish it in the the next. A filmmaker may use this as it creates a continuous shot and you can film the same shot twice and then put them together. By doing two shots you can change the position of the camera without altering the continuity of the shot. An example would be when someone walks through a door. The camera can be placed outside the room filming the character going in, then in the next shot you can move the camera into the room and watch the character entering the room. When using Match on Action, the camera operator and the character must ensure that everything is in the same position in both shots. If a filmmaker didn't use Match on Action to film a shot like this, it would create a jump shot, and therefore it will not be continuous. The audience are likely to get confused if they do not see the full extent of the action.

Another type of continuity editing is Eye Line Match. This is when you see the character looking at something off screen, leaving the audience to wander what they are looking at, then in the next shot the camera cuts to the person or object the previous character was looking at. Filmmakers may want to use this as it creates a sense of mystery within the audience as we are left wandering what the character was looking at. They may also want to use it to create an element of shock and tension. If the audience can't see what the character is looking at then they begin to question the situation and start to formulate their own understandings. If a filmmaker didn't use Eye Line Match then the scene wouldn't create as much tension as we'd be able to see the whole scene just as the characters can.

Shot, Reverse Shot is also a useful style of continuity editing. This type of shot is usually used in scenes where a conversation takes place. It's when the camera changes between faces and we see a shot of one character looking at another character, then we are shown the other character looking back. A filmmaker might want to use this as it makes the audience feel like we are the ones talking to the characters, creating a sense of empathy. Changing the shot creates a focus on the particular characters rather than being shown the whole scene. It keeps the audience engaged with what is going on to. If filmmakers didn't use Shot, Reverse Shot then the audience may start to become bored as it would be one continuous shot throughout. Also, if it isn't used then the audience may not hear important information and this may lead to confusion further on in the film.

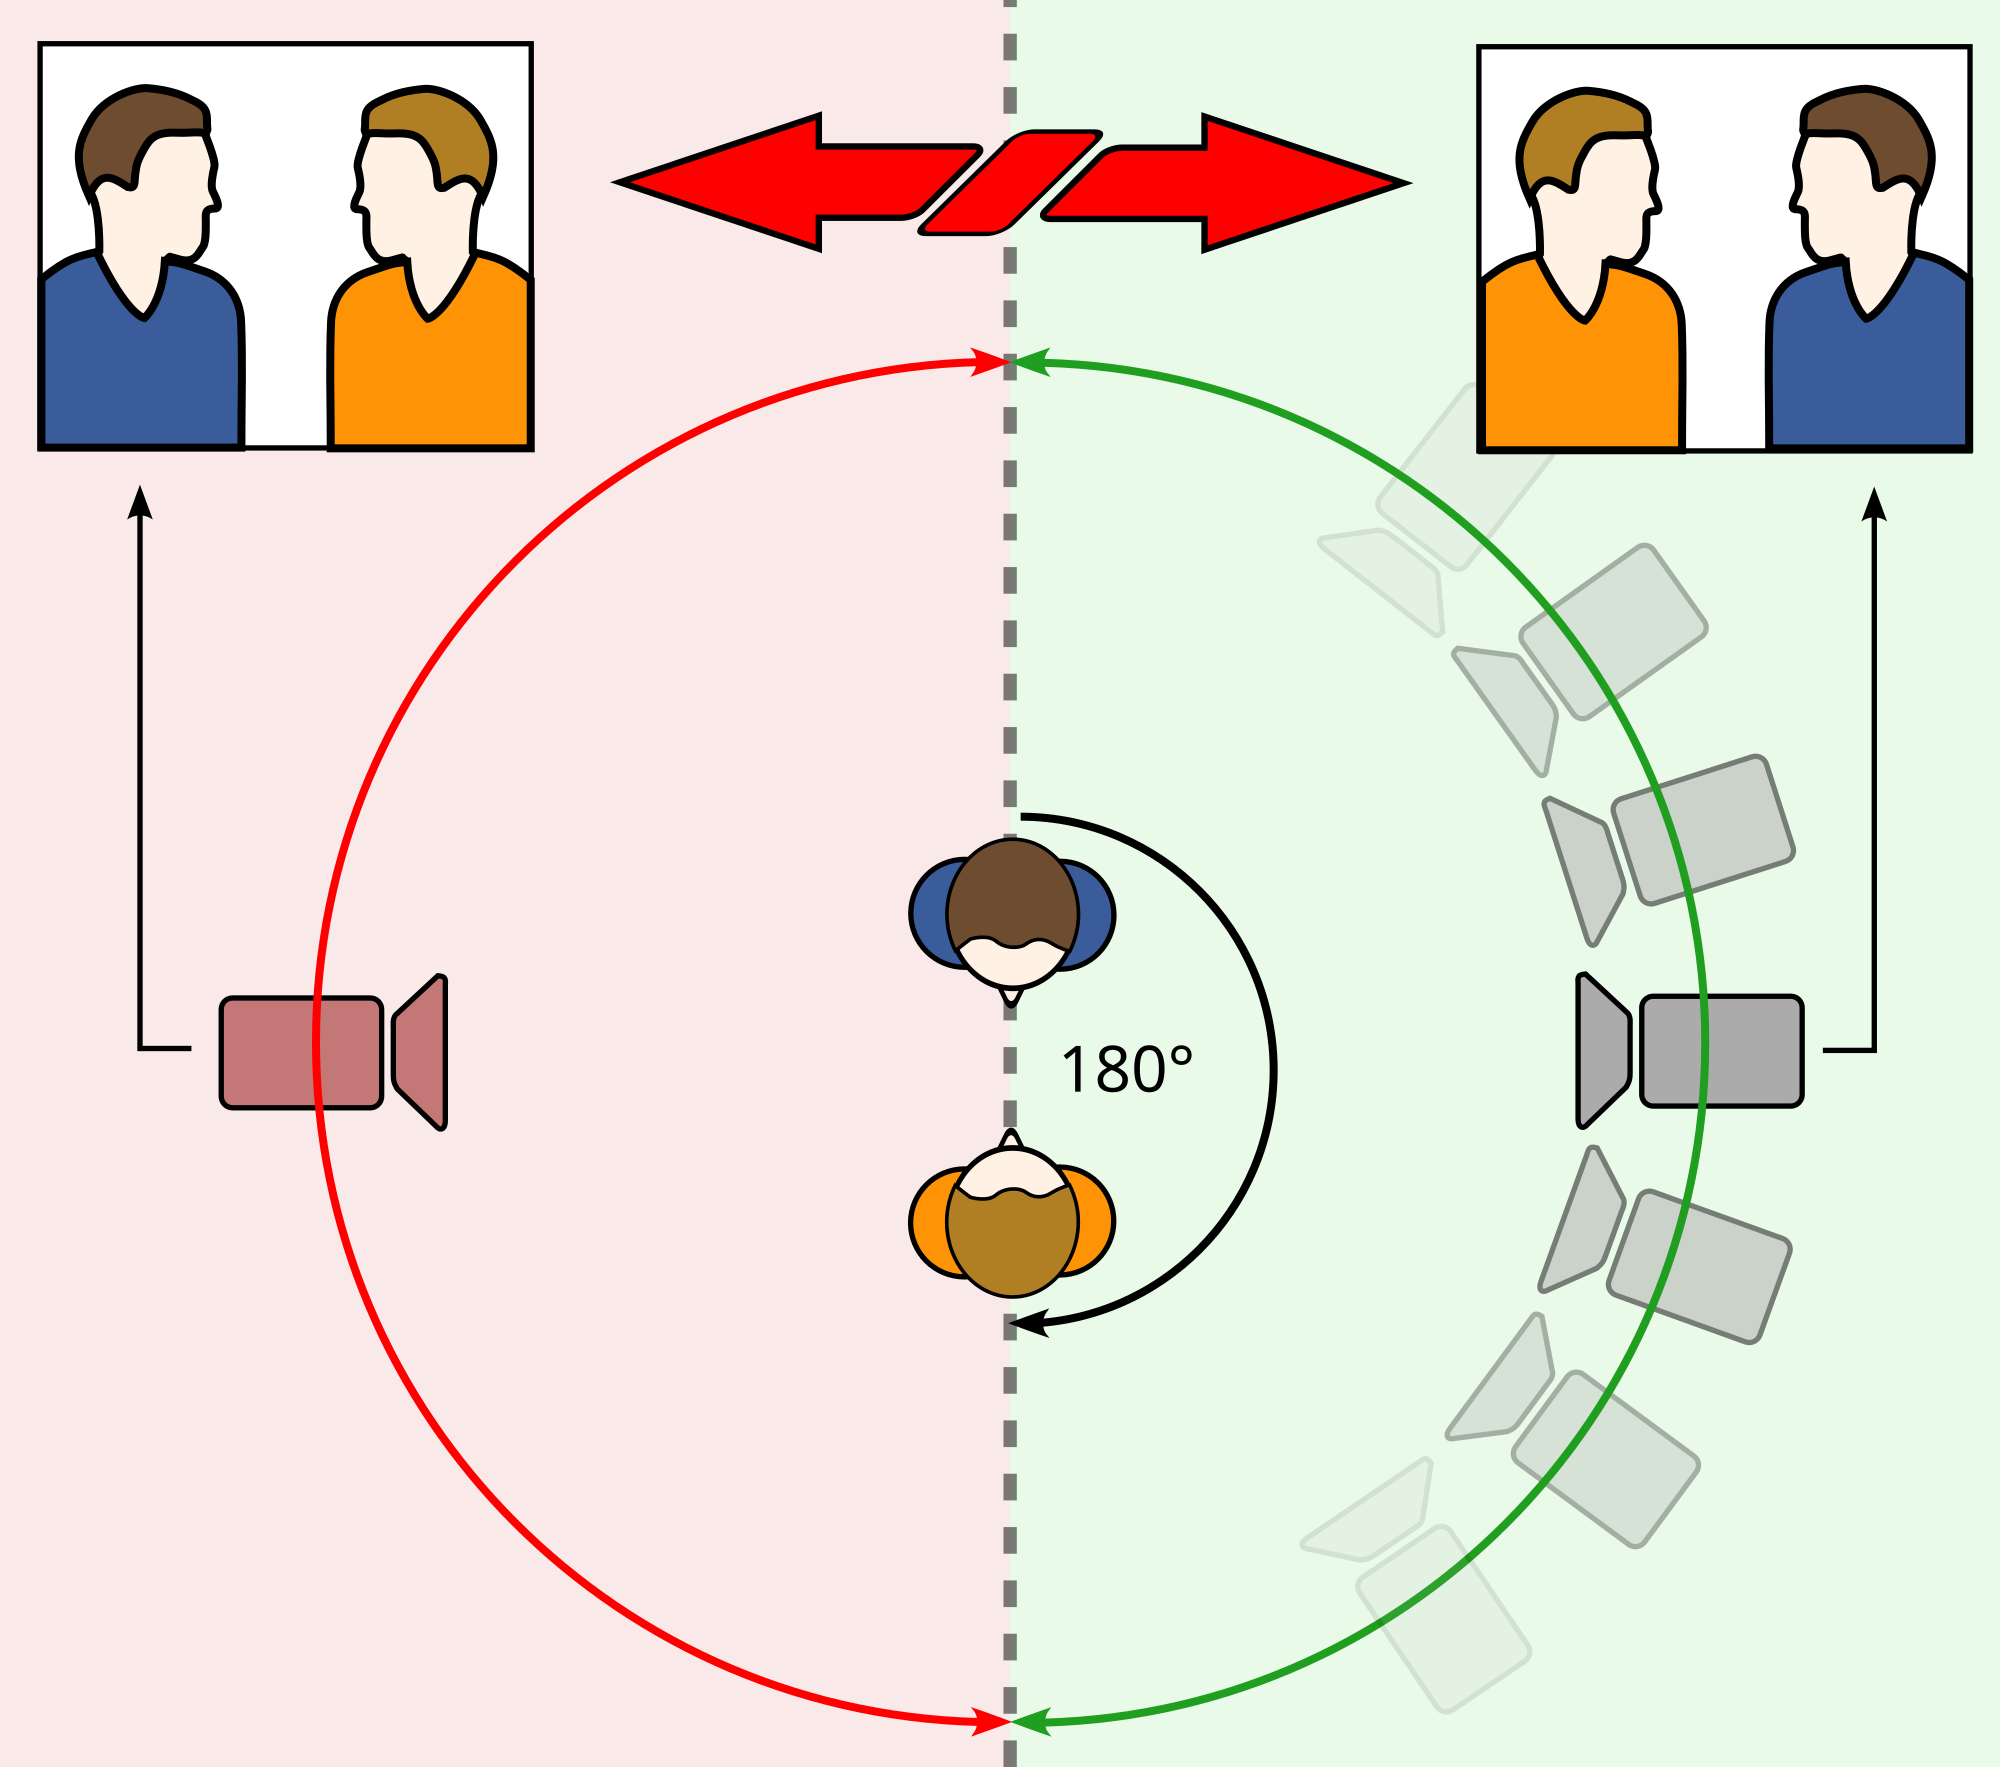
The last technique of continuity editing is the 180 Degree Rule. This is the positioning of the camera in scenes where we see different characters, usually communicating with each other. During this communication the camera operator must make sure that the camera stays on one side of the imaginary axis ensuring that the characters on the left and right stay on the left and right sand don't switch places. Filmmakers may use the 180 Degree Rule to enable the audience to visually connect with the movement happening around the characters. If a filmmaker didn't us it then the scene would create disorientation and confusion within the audience as the perspective is altered. The only time it is suitable to break the rule is if the director purposely wants it broken to enforce confusion and disorient in the audience to foreshadow danger or change.

An example of when this 180 Degree Rule is purposely broken is in The Shining.

The first type of continuity editing is Match on Action. This is when you start an action in one shot and finish it in the the next. A filmmaker may use this as it creates a continuous shot and you can film the same shot twice and then put them together. By doing two shots you can change the position of the camera without altering the continuity of the shot. An example would be when someone walks through a door. The camera can be placed outside the room filming the character going in, then in the next shot you can move the camera into the room and watch the character entering the room. When using Match on Action, the camera operator and the character must ensure that everything is in the same position in both shots. If a filmmaker didn't use Match on Action to film a shot like this, it would create a jump shot, and therefore it will not be continuous. The audience are likely to get confused if they do not see the full extent of the action.

Another type of continuity editing is Eye Line Match. This is when you see the character looking at something off screen, leaving the audience to wander what they are looking at, then in the next shot the camera cuts to the person or object the previous character was looking at. Filmmakers may want to use this as it creates a sense of mystery within the audience as we are left wandering what the character was looking at. They may also want to use it to create an element of shock and tension. If the audience can't see what the character is looking at then they begin to question the situation and start to formulate their own understandings. If a filmmaker didn't use Eye Line Match then the scene wouldn't create as much tension as we'd be able to see the whole scene just as the characters can.

Shot, Reverse Shot is also a useful style of continuity editing. This type of shot is usually used in scenes where a conversation takes place. It's when the camera changes between faces and we see a shot of one character looking at another character, then we are shown the other character looking back. A filmmaker might want to use this as it makes the audience feel like we are the ones talking to the characters, creating a sense of empathy. Changing the shot creates a focus on the particular characters rather than being shown the whole scene. It keeps the audience engaged with what is going on to. If filmmakers didn't use Shot, Reverse Shot then the audience may start to become bored as it would be one continuous shot throughout. Also, if it isn't used then the audience may not hear important information and this may lead to confusion further on in the film.

The last technique of continuity editing is the 180 Degree Rule. This is the positioning of the camera in scenes where we see different characters, usually communicating with each other. During this communication the camera operator must make sure that the camera stays on one side of the imaginary axis ensuring that the characters on the left and right stay on the left and right sand don't switch places. Filmmakers may use the 180 Degree Rule to enable the audience to visually connect with the movement happening around the characters. If a filmmaker didn't us it then the scene would create disorientation and confusion within the audience as the perspective is altered. The only time it is suitable to break the rule is if the director purposely wants it broken to enforce confusion and disorient in the audience to foreshadow danger or change.
An example of when this 180 Degree Rule is purposely broken is in The Shining.
Thursday, 16 October 2014
Task Six - Creating a Montage
The first style of Montage we created was a Hollywood Montage which is when you condense the clips of a whole day into a short sequence that shows everything in a shorter amount of time. We used the Rocky clip as inspiration for our own Hollywood Montage. The idea behind it is to include different aspects of a certain thing.
The intention behind our Montage was to film the main parts of a school day and condense them into one short clip that sums the day up. Doing this means that we could pick out the most important parts which sum up the day. The Montage creates meaning if someone, who is not at school, is watching it they can see the main elements of a school day in a short amount of time. The use of the song in the background makes the video seem like it is going quicker as it is quite upbeat and keeps the audiences attention.
I believe that our video is a successful example of a Montage as it does everything that a Hollywood Montage should do. It is successful because you can clearly see what is happening in the video and it is easy to understand the point of it, to show a school day in a short amount of time.
The second style of Montage we created was a Soviet Montage. This is when you juxtapose two different shots that did not exist in either shot alone and put them together to create a deeper meaning.
The intention behind the Montage was to show the images of a student having problems with bullying. Filming this in the style of a Soviet Montage meant that we could juxtapose two different shots which wouldn't normally be related to emphasise the life of the student. It creates meaning as the audience can see clearly how the main character is feeling and whether or not she deals with her problems.
I believe that our example of a Soviet Montage was successful because the different shots relate well to each other even though they were completely non related. The audience can clearly see what the intentions of the film were.
Wednesday, 15 October 2014
Task Five - Understanding Montage Theory
A Montage is the technique of selecting, editing and piecing together separate sections of a film or short clip and putting them together to create a continuous whole. There are three main forms of Montage; The French Montage, Hollywood Style Montage and a Soviet Montage.
A French Montage literally means to 'assemble' a film or clip. Therefore, in French Film the term simply identifies the process of editing. A Hollywood Montage is when the film maker picks out the most important/main clips of something and then condense them into a short sequence that shows all these clips. Doing this creates different aspects and condenses a long narrative sequence into a shorter one. Finally, a Soviet Montage is when the film maker juxtaposes different shots that didn't exist in either shot alone to create a new, deeper meaning. Usually the two different shots contrast with each other but bring the film together to reveal the hidden meaning.
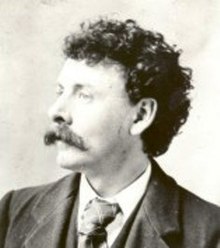
Two key film makers who were famous for their montages are Les Kuleshov and Sergei Eisenstein. Les Kuleshov is famous for the Kuleshov Experiment which is when he used the same image of a man and compared it to three other random pictures.
Lev Kuleshov

Kuleshov Experiment

A Hollywood Montage is when you make a short film which shows all the most important parts of a certain thing, such as a day. A famous example is the training scene from Rocky. In this clip we see Rocky training but instead of filming the whole thing we are only shown the most important parts of the day. As the audience we can see it is a whole day as the clip starts of with Rocky running in the morning, and then by the end of the clip we can see from the background light that it is the evening/end of the day.
Sergei Eisenstein is also an important filmmaker as he introduced us to the Soviet Montage. Sergei's first feature length film was called Strike in which he shows a video of the suppression of the strikers and then cross-cuts it to shots of cattle being slaughtered. The idea of this was to show the audience the way in which these strikers were treated.
Thursday, 9 October 2014
Task Four - From Analogue to Digital Editing
There are many different types of editing that can be used to create a film or clip. Over the years, however, these have changed and we now only really use one type of editing, Digital.
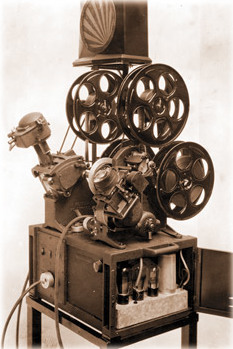
Analogue editing is the cutting together of pieces of celluloid film and then putting them in the order that is needed. Traditionally films were made up of a collection of pictures printed on to acetate negatives, and these images were then spliced together to create a reel of film. These reels of film are then fed through a projecter at a constant speed of 24 frames per second, which in turn makes the pictures look like they are moving and living. The traditional ways of editing these films was by the use of The Moviola, which was invented in 1924 by Iwan Serrurier.. The Moviola was the first device that allowed a film editor to view the film and edit it simultaneously. This was the first machine used for feature length motion picture editing.
Another form of editing is Video Editing. This type of editing was around before technology became available, when magnetic tapes were used to store information, most people knew these as Video Tapes (VHS). Video Editing is the process by which segments of these tapes were edited using a device that mechanically puts pieces of video tape together. This method requires the editing to be done in the correct order first time round to avoid mistakes. This is also known as Linear Editing.
Digital Editing is the most common form of editing nowadays and it is a form of electronic media where the data is stored in digital form, as opposed to the previous methods of analogue editing. Digital Editing is the use of computers to order and manipulate this digital data. This can be done through the use of many different programs such as Adobe Premier, Avid and Final Cut Pro. The way Digital film editing is done is by using bits and bytes (strings of 1's and 0's) to record, transmit and replay images, instead of the old method of chemicals on a film. Because the whole process is electronic there is no splicing involved which meant that it soon took over Video Editing as it proved to be much quicker and cheaper. The biggest pro to Digital Editing is that you can edit in any order. This is known as Non-Linear editing. This is when you can edit a sequence from the end of the film before you have started editing the first scene. This was made possible by the use of electronic files so that it made it as easy as cutting and pasting text into a word document.
However, there are many pros and cons to Analogue and Digital Editing. The pros of Analogue editing are that it is quicker and more precise as the people responsible for filming and writing it would tend to take their time as they'd only get one shot. Another pro is that it is safer as the film isn't stored on a computer which means that the likelihood of it being damaged was low. On the other hand there were some cons to Analogue editing. This includes the fact that if you did make a mistake, you would not be able to go back and edit it, and therefore the film you've created will not be at the highest standard. Also, because there were no CD's or VHS' to carry the film around in, it meant that it was a lot to carry and could possibly be expensive and heavy. Also, communication with the person behind the camera was scarce as you couldn't edit out someone saying action for example.
There are also pros and cons to Digital Editing. A pro is that because it is edited digitally it means you can put the clips together in whatever order you wanted and it means that you don't necessarily have to film it in the order that you want it to be shown. This means that you also get more than one chance to edit it, meaning that you can make it as good as possible. Although there are some cons to Digital Editing. For example some people may find that it is too complex for them to understand and may therefore struggle when it comes to editing their film. Additionally, because you have the ability to edit it as many times as needed, not as much effort may be put into it and it may not then be to the best of their ability. Finally, because Digital Editing relies mostly on technology, you can't always be sure that the technology you are using won't break. There is always a chance that what you edit and film may be lost if something happens to the technology.
Friday, 26 September 2014
Task Three - Developing Editing Techniques
The term 'In-Camera Editing' literally means editing in camera. Instead of uploading your video on to an editing program and editing it, you film your sequence on the camera and it edits it automatically, putting the scenes in the right place. In-Camera editing was first discovered accidentally by George Melies when his camera broke down for a brief minute during the filming of his film 'The Vanishing Lady' (1896).
There are many pros to in-camera editing, but there are also many cons. Some of the pros are that it takes less time to create. Because the camera edits the film for you, there is no need to attach it to a computer to edit, therefore taking up less time. Another pro is that when you are filming it creates a constant video without any jumps from one scene to the other, meaning that the film runs more fluently. For example, in my video there is a scene where I am running up the stairs, which had to be shot from two different angles. This meant making sure that I was in the right place for the second shot, which I was, making the video run smoothly. Also, when you edit in camera you are forced to think more about what you are filming as you only get one shot at it and if it goes wrong its hard to correct. Having only one shot means that instead of filming and knowing that you can change what you've done and re shoot, you plan what you're going to film in advance, genuinely making it better as more thought has gone into it.
However there are also many cons to in-camera editing. The main con is that if you film a scene wrong you can't go back and change or delete it. This means that when you watch the film, the scene will still be there as part of your video. For example in my video, there was a shot where the camera filmed for a bit longer than we intentionally wanted, meaning that there was a shot of the stairs when no body was acting. Another con is that it is hard to communicate with the person behind the camera, i.e it is hard for the actor to know when to start acting and when to stop, especially if it starts off scene as you don't necessarily want somebody shouting action in the shot. Also, another problem is that if you stop recording one scene whilst the actor is still in shot and then you want to carry on the scene in another shot, you have to make sure that the person acting is in the exact same place as the shot before, meaning that there will be a brief period of time where the actor isn't moving interrupting the flow of the film. Making sure that the camera angle is right is also another con as if you are filming two different shots in the same place, you must make sure that the camera is in the same position in both of the shots otherwise the framing of the shot will be wrong.
Editors, however, have moved on from in-camera editing for many reasons. The main reason being that in the film industry today, actors and actresses are extremely busy, meaning that they are not always available to shoot the same time as the other actors. Moving on from in-camera editing means that you can film scenes with one actor, then the scenes with the other actor and put them together. If in-camera editing was the only way of editing then it would take a lot longer, and be a lot harder to create a film, feature length movie or TV series. Also, the growth of technology means that there are better ways of creating movies, that are a lot more efficient. Editing in-camera would take to much time and reduce the quality of the end product.
 |
| George Melies |
There are many pros to in-camera editing, but there are also many cons. Some of the pros are that it takes less time to create. Because the camera edits the film for you, there is no need to attach it to a computer to edit, therefore taking up less time. Another pro is that when you are filming it creates a constant video without any jumps from one scene to the other, meaning that the film runs more fluently. For example, in my video there is a scene where I am running up the stairs, which had to be shot from two different angles. This meant making sure that I was in the right place for the second shot, which I was, making the video run smoothly. Also, when you edit in camera you are forced to think more about what you are filming as you only get one shot at it and if it goes wrong its hard to correct. Having only one shot means that instead of filming and knowing that you can change what you've done and re shoot, you plan what you're going to film in advance, genuinely making it better as more thought has gone into it.
However there are also many cons to in-camera editing. The main con is that if you film a scene wrong you can't go back and change or delete it. This means that when you watch the film, the scene will still be there as part of your video. For example in my video, there was a shot where the camera filmed for a bit longer than we intentionally wanted, meaning that there was a shot of the stairs when no body was acting. Another con is that it is hard to communicate with the person behind the camera, i.e it is hard for the actor to know when to start acting and when to stop, especially if it starts off scene as you don't necessarily want somebody shouting action in the shot. Also, another problem is that if you stop recording one scene whilst the actor is still in shot and then you want to carry on the scene in another shot, you have to make sure that the person acting is in the exact same place as the shot before, meaning that there will be a brief period of time where the actor isn't moving interrupting the flow of the film. Making sure that the camera angle is right is also another con as if you are filming two different shots in the same place, you must make sure that the camera is in the same position in both of the shots otherwise the framing of the shot will be wrong.
Editors, however, have moved on from in-camera editing for many reasons. The main reason being that in the film industry today, actors and actresses are extremely busy, meaning that they are not always available to shoot the same time as the other actors. Moving on from in-camera editing means that you can film scenes with one actor, then the scenes with the other actor and put them together. If in-camera editing was the only way of editing then it would take a lot longer, and be a lot harder to create a film, feature length movie or TV series. Also, the growth of technology means that there are better ways of creating movies, that are a lot more efficient. Editing in-camera would take to much time and reduce the quality of the end product.
Thursday, 25 September 2014
Wednesday, 17 September 2014
Task One - Editing In Early Cinema
Over the first 50 years of film the concept of editing has become much more advanced. From the very earliest films to today's latest films. The very first edits were things such as filming moving people and splicing parts of a film and sticking them together. Since then the art of editing has advanced and we now have easier ways of doing it.
One of the very first film makers was Thomas Edison, who also invented the light bulb. Edison was the inventor of the Kinetographic Camera and the 35mm film strip. He was a very important figure as his creation of the Kinetoscope became the industry standard. This meant that other film makers could use his invention to create their own films. Eventually, Edison made the projector, which then meant that the films he created could be shown to the wider audience and be enjoyed by everyone.
Thomas Edison

The Lumiere Brothers also played a big part in the development of editing. They worked closely with Thomas Edison and were the first people to create films of different lengths and create a moving image of real life people. Motion in the shot was all that was necessary to amuse the audience as they had never seen anything like that before. The films they created were among the first films to show activity. One of their first films was called 'Sortie d'usine' (1895) which showed a group of people leaving a factory.
The Lumiere Brothers

Initially there was no story or real editing in many early films, however G.A Smith was the first real film maker that enabled editing of movies. His film 'A Kiss in the Tunnel' (1899) marked the beginning of narrative editing story line. G.A Smith stated that "some extra spice was called for" and then created the 'Phantom Ride' genre as a way of creating a twist to his movies. The 'Phantom Ride' consisted of putting a camera on the front of a train and recording its path. In 'A Kiss in the Tunnel' G.A Smith took advantage of the brief period of darkness as the train went in the tunnel and edited the film to change from the front of the train to one of the inside carriages. This was the point when editing first started to advance.
G.A Smith
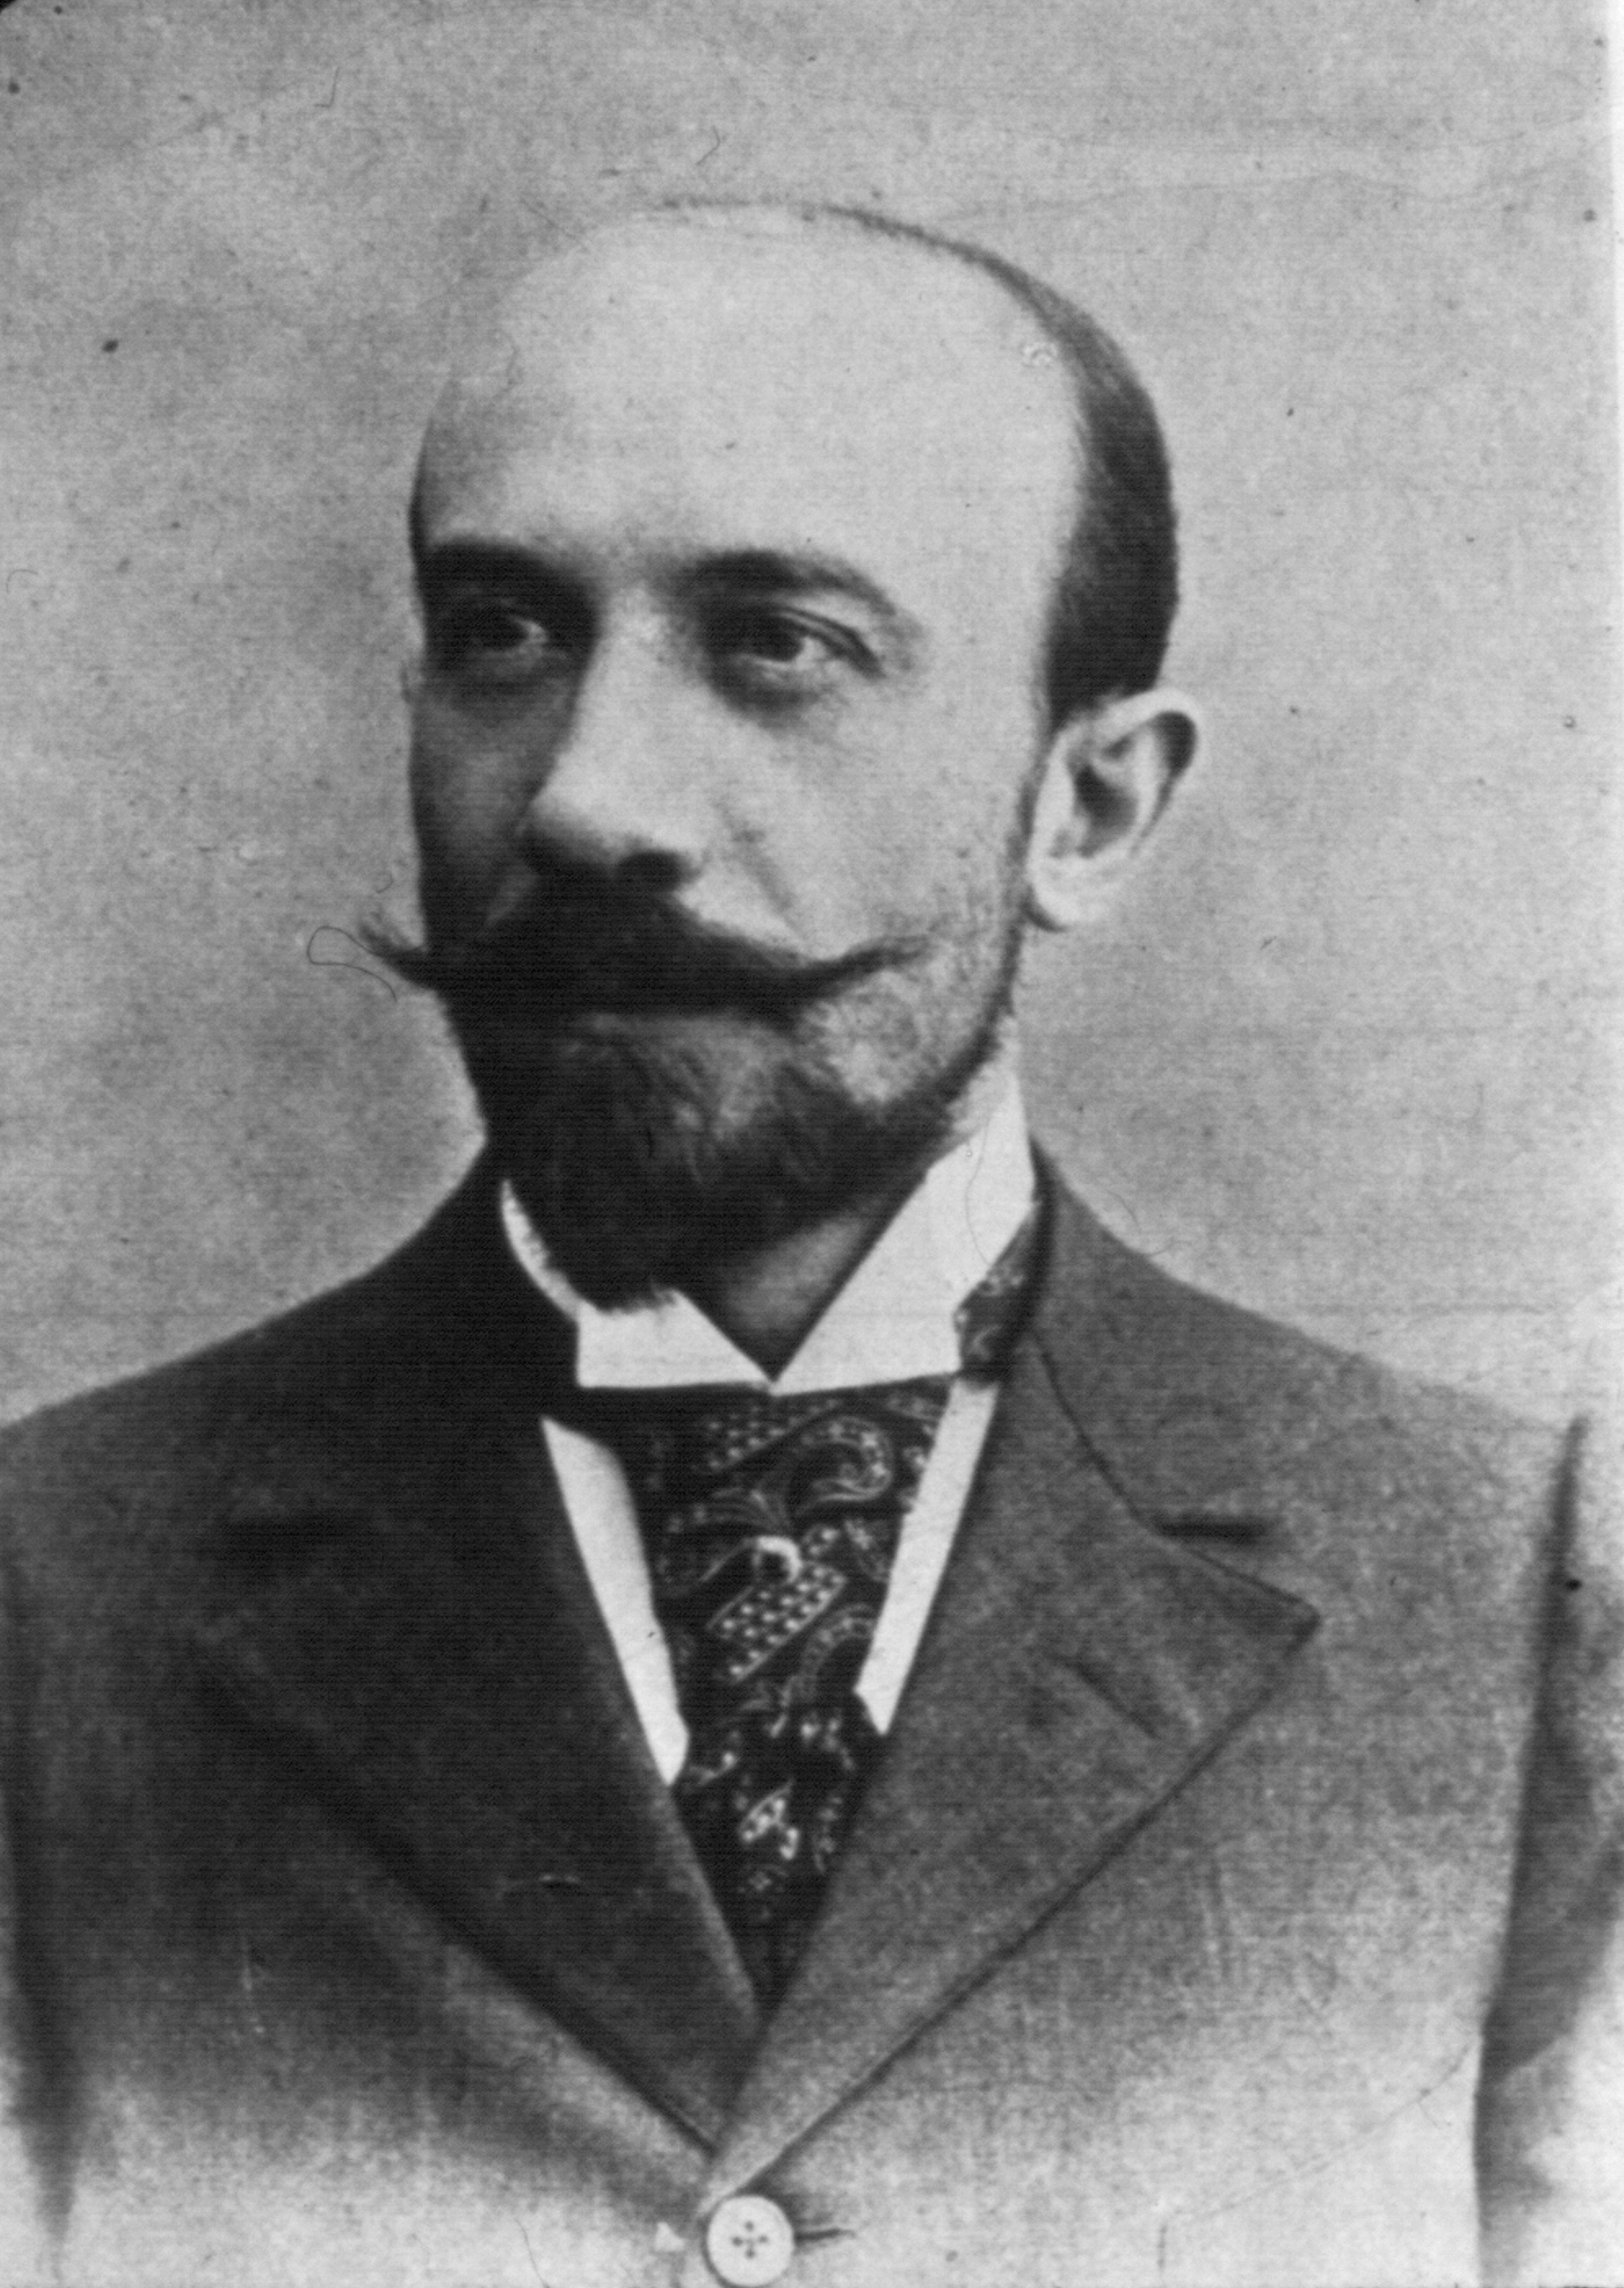
Although G.A Smith introduced the first real example of editing, George Melies was also quite an important figure in the editing of early cinema. George Melies was a magician and had seen the films that The Lumiere Brothers had created and saw that there was a possibility of introducing magic into a film so that it became novelty more than just motion. Whilst filming his ideas he discovered the art of Stop Motion purely by accident, he was filming a scene when his camera broke down for a brief second. Before he had discovered this, it had never occurred to him to move the camera to incorporate different shots into his films. Using this knowledge he created the film 'The Vanishing Lady' (1896). Even though he discovered the art of Stop Motion and was the first person to apply magic to his films, eventually the commercial growth of the industry forced him out in 1913 and this resulted in him dying in poverty. You can see elements of his life depicted in the film Hugo.
George Melies
Edwin S Porter also played an important part in the editing of early cinema. Before joining the film laboratory of Thomas Alva Edison in the 1890s, Edwin worked as an electrician. Edwin and Edison worked together to make longer, more interesting films. Their first film was 'The Life of an American Fireman' (1903), which was the breakthrough film for Edwin S Porter. 'The Life of an American Fireman' was one of the first films that had a plot, action and even a close up, by creating this film he discovered the important aspects of motion picture language and the creation of contextual relationships by splicing. One of his most famous films was 'The Great Train Robbery' (1903) which lasted a length of 10 minutes, making it the longest movie of his time.
Edwin S Porter

Edwin S Porter
Charles Pathé introduced the first example of parallel editing in his film 'The Horse that Bolted' (1907). He made a film that cut between two different story lines so that the audience could see what the man was doing as well as the horse. The use of this parallel editing allows the audience to know that there are two different things happening at the same time as we see the man on the horse at the beginning and then we see him leave the horse outside. The shot then changes from the man to the horse outside, allowing us to see both shots alternatively. This was the first time the audience had seen a film like this and it proved to be successful.
Charles Pathé

Finally, D.W Griffith was the last important figure in the editing of early cinema before films were created as the ones we know today. D.W Griffith was an early supporter of the power of editing and made use of cross-cutting to show parallel locations. He was one of the first early directors to use editing techniques in feature length films, which were generally movies that lasted longer than 90 minutes. He created the movie 'The Birth of a Nation' (1915) which lasted around 3 hours, making it one of the longest and most controversial films of early cinema and to this day it is still controversial.
D.W Griffith

Subscribe to:
Comments (Atom)